1. Locating the connection point
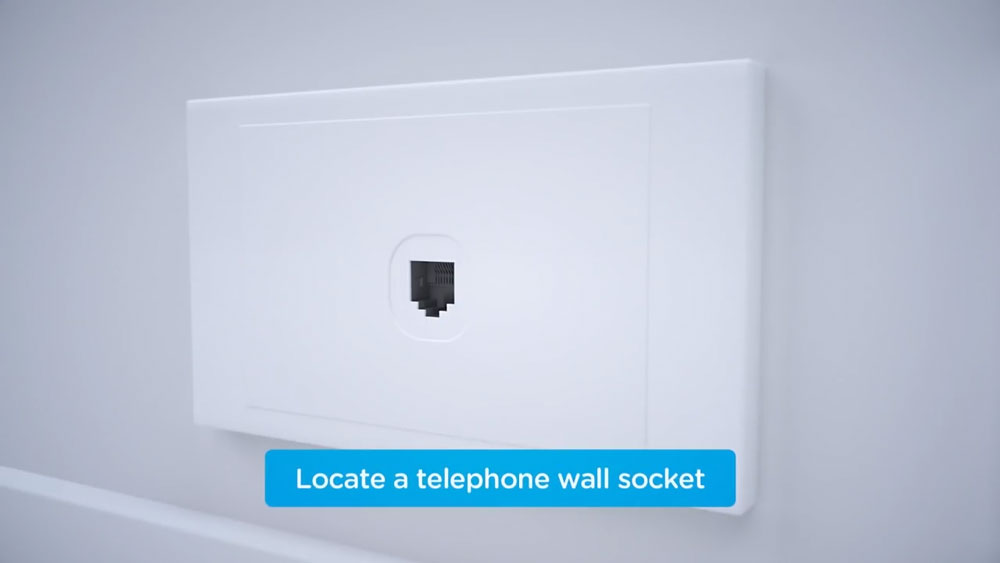
You will need to locate your nbn® connection point, which will be a wall socket in your home. They’re most commonly found in the main living room space or bedrooms, but can sometimes be in the kitchen area. It should look something like the photo below. Make a note of all the sockets in your home, even ones that may be in non-ideal locations such as bedrooms.
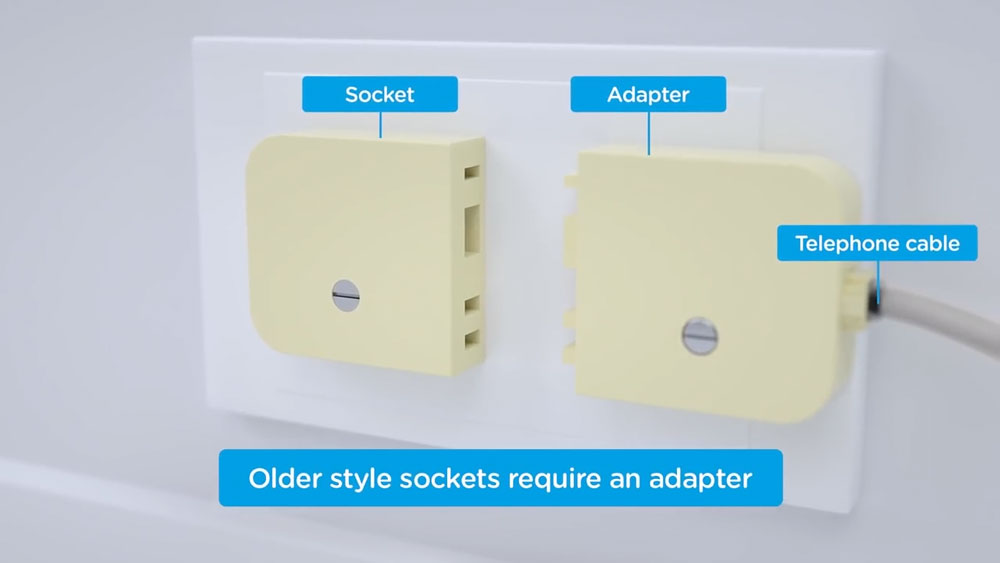
If your home has an older style wall socket shown below (typically the plug is a yellow square with 3 prongs), you’ll need to purchase a Jackson adapter that allows you to plug in a modern RJ11 telephone cable. These adapters can be purchased at most electronics and computer stores.
Once you’ve found your nbn connection point, to connect your new Moose nbn service:
- Simply reply to the SMS with the unique 6-digit activation code.
OR
- Head to our website and hit the Activate button on the front page
OR
- Call us on 1300 566 673
2. Connecting your device
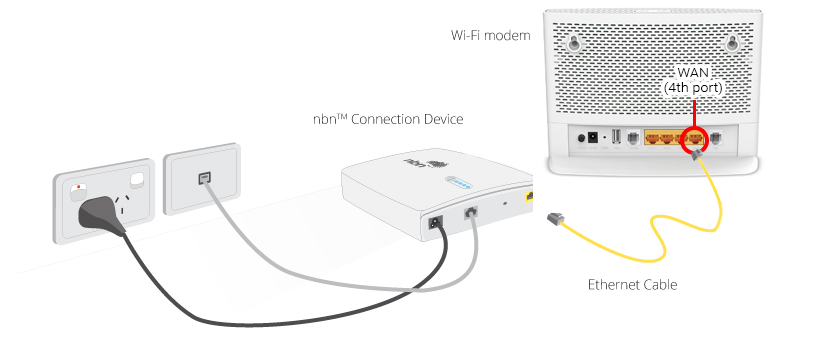
You will need find and plug in your nbn connection device first, which is a flat, square, white box that should look like the image below. Plug the included black power cable from plug A (POWER) on the back of the box. Plug the other end of the power cable into a power wall outlet in your home and switch the powerpoint on.
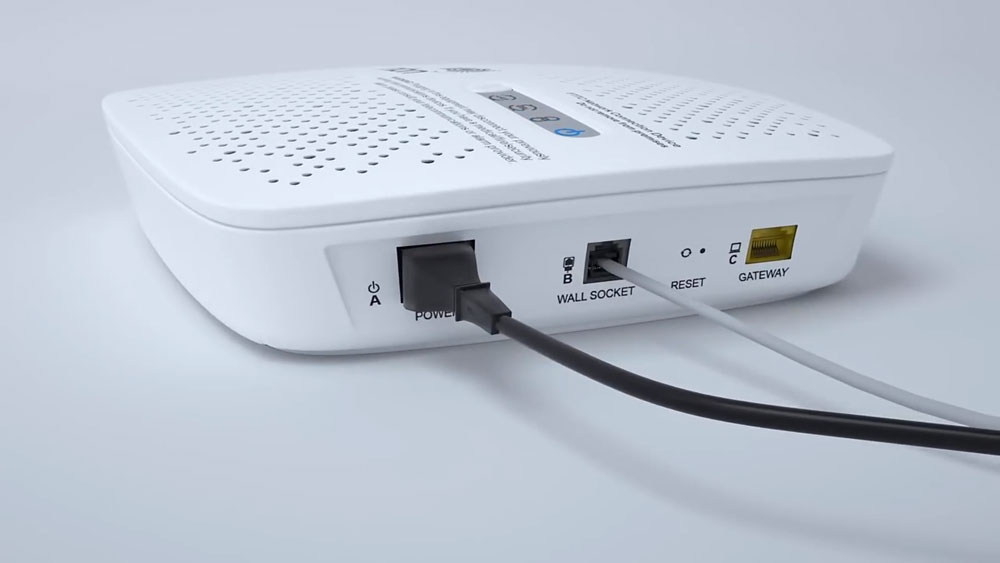
Now find the grey telephone cable that is included in your Moose modem box into the B (WALL SOCKET) port on the back of the nbn connection device. Plug the other end of the telephone cable into your wall socket.
You will now need to wait for the connection light and the DSL light on the top of the nbn box to turn solid blue – this may take up to 15 minutes.
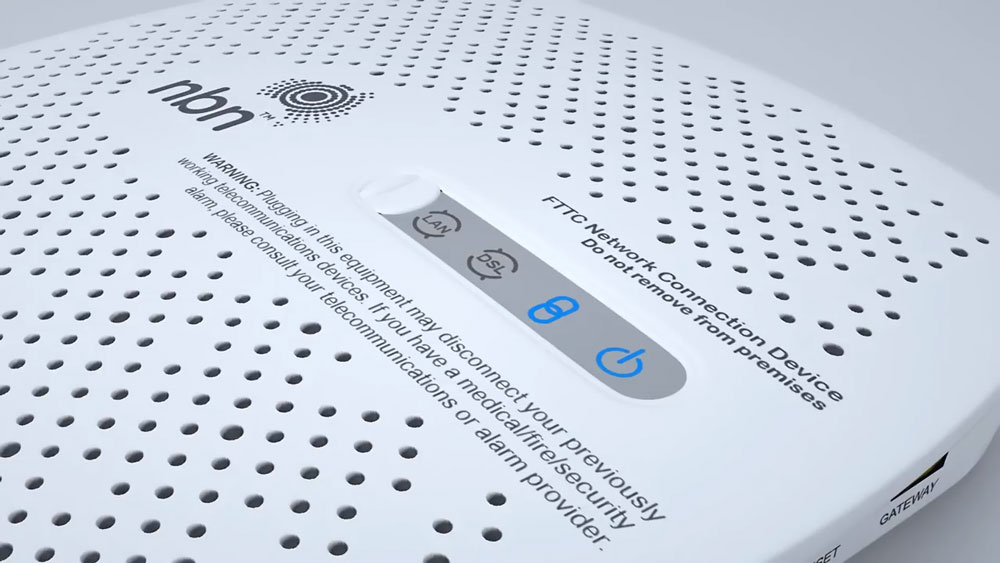
If the connection light and DSL light do not turn solid blue after 15 minutes and you have more than one socket in your home, please plug the nbn box into the other sockets into your home and repeat the above steps. If you have tried every wall socket in your home and the lights do not turn blue in any instance, please contact our support team on 1300 566 673 for further troubleshooting.
3. Connecting your modem
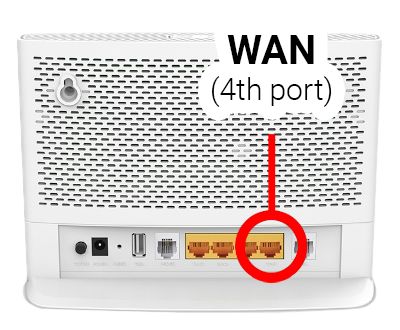
You will now need to plug in your new Moose modem. Simply ensure the supplied yellow Ethernet cable is plugged into the yellow GATEWAY port on the back of your nbn connection device and to the WAN port on the back of your modem. The WAN port is the furthermost right ethernet port (yellow ports) on your new modem. Ensure the power cable is plugged into a power outlet and switched on. Once completed, your setup should look like the below image.
You’ll know your internet is ready to use when the “Internet” light on the front of your modem is flashing green.
Your Moose modem will begin broadcasting Wi-Fi as soon as it is plugged into power, turned on and has finished booting up. You can then connect your devices such as computers, phones, and tablets via Wi-Fi.
Your modem will broadcast a 2.4GHz network and a 5GHz network. Moose recommends connecting to the standard 2.4GHz option for a more reliable and consistent Wi-Fi connection.
The modem’s Wi-Fi name and password are printed on the back of the modem and respectively labelled as:
- SSID
- Wireless Password / Pin
(Below is for illustration purposes only, your Wi-Fi password and username will be different and will be on the back of the modem we send you)

If you run into any issues with your supplied Moose modem, please call us on 1300 566 673 for assistance.